Tiny amigurumi cup – Free crochet pattern
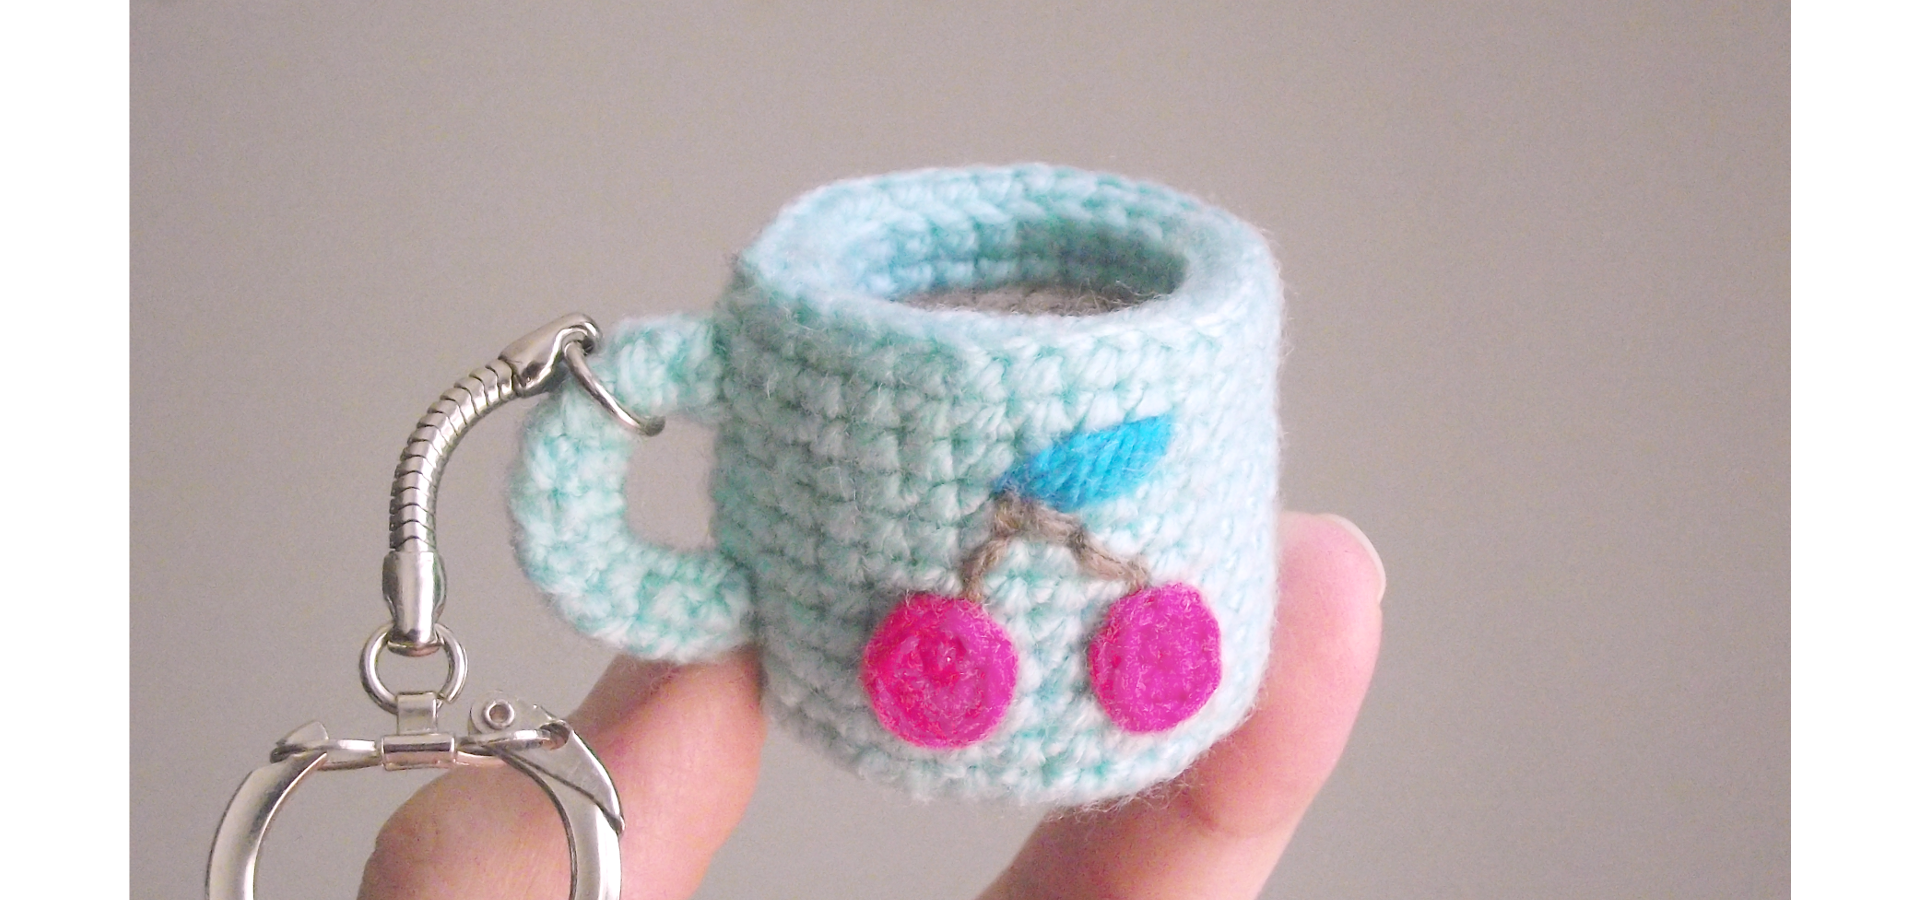
How to make a tiny amigurumi cup.
Great to make cute keychains. ♥
- Written instructions (US terms)
- Charts
- Schematics
Tools and Materials
- 100% acrylic baby weight yarn (blue and brown)
- 3mm / D crochet hook
- Polyester filling
- Yarn needle
- Scissors
Abbreviations
- st(s) : stitch(es)
- sl st: slip stitch
- ch : chain
- sc : single crochet
- sk : skip the next st
- flp : front loop only
- blp : back loop only
- [ ] : work instructions within brackets as many times as directed.
Pattern
Round 1 : With brown yarn, make a magic ring : work 6 sc in the ring, join with a sl st, — (6 sts)
Don’t cut nor carry the tail end : you’ll need it later.
Round 2 : Ch 1, 2 sc in each st around, sl st — (12 sts)
Round 3 : Ch 1, [2 sc in next st, sc in next st] 6 times, sl st — (18 sts)
Round 4 : Ch 1, [2 sc in next st, sc in next 2 sts] 6 times, change color (blue) while joining with the sl st — (24 sts)
Round 5 : Ch 1, flp : sc in each st around, sl st — (24 sts)
Rounds 6-7 : Ch 1, sc in each st around, sl st — (24 sts)
Round 8 : Ch 1, blp : [2 sc in next st, sc in next 3 sts] 6 times, sl st — (30 sts)
Round 9 : Ch 1, blp : sc in each st around, sl st — (30 sts)
Rounds 10-18 : Ch 1, sc in each st around, sl st — (30 sts)
Leave enough yarn to sew the bottom to the cup.
Bottom :
Round 1 : With blue yarn, make a magic ring, work 6 sc in the ring, join with a sl st, — (6 sts)
Don’t cut nor carry the tail end.
Round 2 : Ch 1, 2 sc in each st around, sl st — (12 sts)
Round 3 : Ch 1, [2 sc in next st, sc in next st] 6 times, sl st — (18 sts)
Round 4 : Ch 1, [2 sc in next st, sc in next 2 sts] 6 times, sl st — (24 sts)
Round 5 : Ch 1, [2 sc in next st, sc in next 3 sts] 6 times, sl st — (30 sts)
Handle :
Ch 10,
Row 1 : sk 1, sc in each st, — (9 sts)
Rows 2-3 : ch 1, turn, sc in each st, — (9 sts)
Leave enough yarn to whip stitch the long edges of the rectangle together + attach the handle to the cup.
Assembly :
Let’s start with the handle : Whip stitch the long edges together.
Start filling the cup with polyester stuffing (not much).
Take the cup’s and the bottom’s tail ends and tie them together so that the cup stays hollow and the bottom stays flat(ish).
You can sell finished objects made from this pattern, but please :
- Don't forget to credit me as the designer,
- Let me know about it by tagging me @petitspixels on social media or by sending me a message. I'll be happy to add a link to your shop / blog on this page. ♥
Contact me ♥